DetectorDuck continuously pings the mesh and listens for replies. For each reply it reads the signal strength (RSSI) and changes the built-in WS2812 LED color to show link quality at your current location. It’s perfect for walk-testing coverage, finding dead zones, and deciding where to place more Ducks.
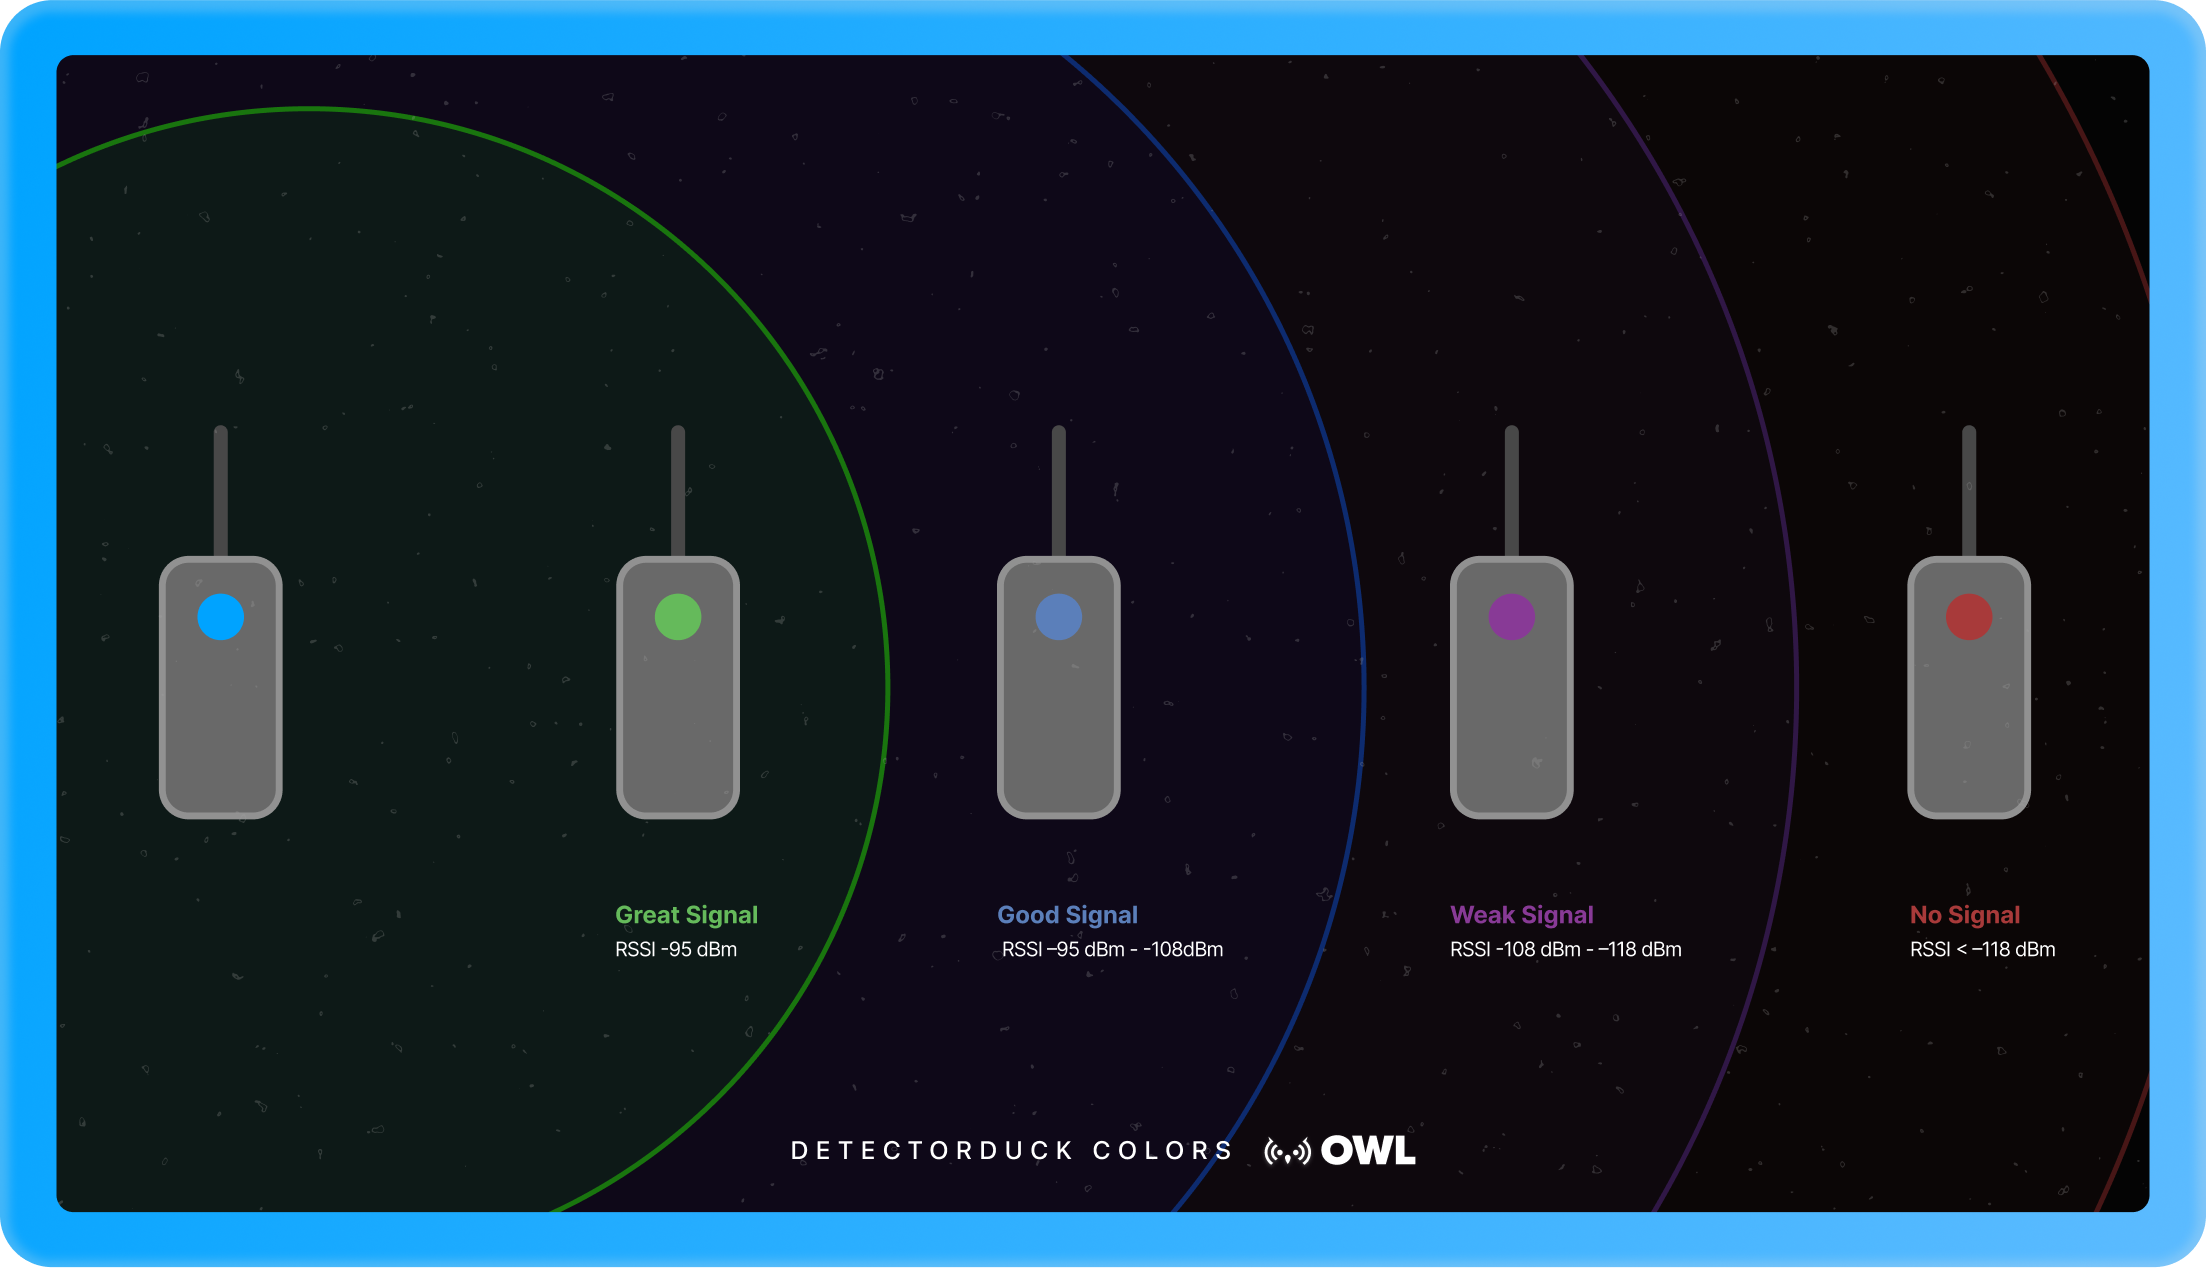
The DetectorDuck is your field tool for mapping and testing the strength of your LoRa mesh. It continuously sends small “ping” packets across the network and measures how strong the replies are. Each time it receives a response, it changes color to show how well it can communicate with the rest of the mesh:
🟢 Green — Great signal ( RSSI > –95 dBm )
🔵 Blue — Good signal ( –108 dBm < RSSI ≤ –95 dBm )
By walking through your deployment area with the DetectorDuck powered on, you can visualize the health of your mesh in real time—without a laptop or dashboard. Every color change reflects the actual radio-link quality (RSSI / SNR) between your node and the rest of the network.
This step helps you:
Identify coverage gaps or dead zones before final deployment.
Verify that MamaDucks can “see” each other and the PapaDuck.
Optimize antenna placement or add relays where the signal drops.
Once you’ve confirmed strong links across your site, you’ll know your mesh topology is ready for reliable data and sensor traffic.
Step 1 — Build Your DetectorDuck
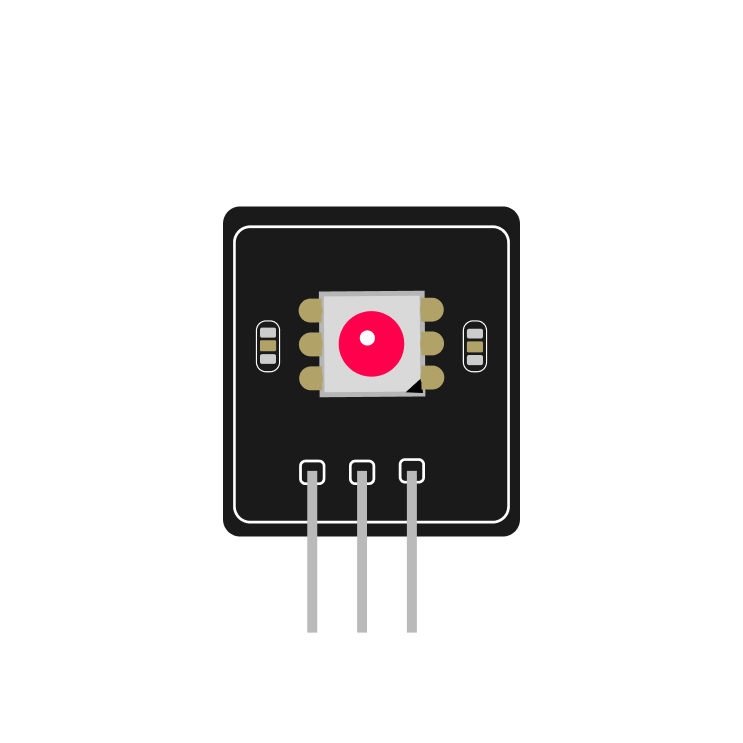
If you purchased a pre-assembled DuckLink, your DetectorDuck is already equipped with an onboard WS2812 (NeoPixel) LED or a small external LED board connected to the data pin — no extra wiring needed. You can skip ahead to the flashing step.
If you’d like to build one yourself, follow these wiring steps to add a single controllable LED:
What You’ll Need
1× WS2812 or SK6812 LED (or small NeoPixel breakout)
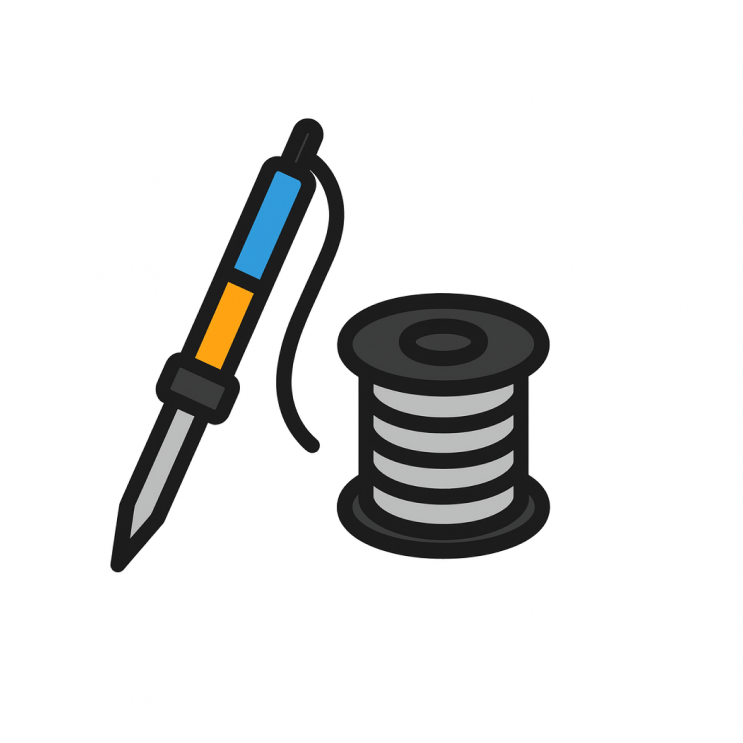
Soldering iron & wire
330–470 Ω resistor (for the data line)
Optional 1000 µF capacitor across 5 V and GND (for power stability)
Wiring Diagram
Use the diagram below as a reference:
GND → GND (shared ground between Duck and LED)
5 V → 5 V (power for the LED)
DATA → GPIO 4 (recommended data pin for LED control)
💡 Tip: Place the resistor inline between the GPIO pin and the LED’s data input (DIN). This protects the LED from voltage spikes.
When soldering, make sure the LED’s arrow points away from the data source — data flows from the Duck → LED.
Once connected, the LED will change color to represent your signal strength (RSSI) once the firmware is flashed and running.
Step 2 Flash firmware
Open Flash Device. Plug in the DetectorDuck over USB.
Select the DetectorDuck firmware under Duck Types
Set the Data Pin (e.g., 4) which you soldered your LED onto.
Flash. When it reboots, the LED will boot Gold, then update per RSSI after the first ping/response cycle.
Step 3 Deploy a mesh
To get meaningful results, ensure you have a mesh topology—multiple Ducks that can forward packets, not just one point-to-point hop.
Minimum useful layout
1× PapaDuck with backhaul (WiFi/LTE/SATCOM), centrally located if possible.
2–3× MamaDucks spaced so each has LoRa overlap with at least one other MamaDuck and the PapaDuck. Rooftops, poles, or elevated windows help.
1× DetectorDuck (you), walking the area.
Why multiple MamaDucks? Mesh = multi-path + self-healing. If one Duck is blocked or fails, traffic reroutes. Your DetectorDuck’s color reflects the effective path back to a responder—not just the nearest node.
Step 4 Walk-test procedure
Baseline: Stand near a MamaDuck in line-of-sight. Wait one or two ping cycles; confirm Green/Blue.
Grid the site: Walk in straight lines or along planned routes (streets, aisles, perimeter).
Log transitions: When colors change (e.g., Blue → Purple), mark the spot. Note obstacles (buildings, vehicles, walls).
Probe dead zones: If Red, backtrack until Purple/Blue returns. Consider where an extra MamaDuck could go to fill the gap.
Repeat from different angles: Body blocking and orientation matter; a step or two can swing RSSI/SNR meaningfully.
Pro tip: do two passes—one line-of-sight pass and one obstructed pass. Multipath and attenuation are real.
Troubleshooting
Always Red: Are you within LoRa range of any MamaDuck that can route to PapaDuck? Check antenna, frequency plan, and that at least one responder is on.
Flaky colors: Try slowing down your walk; wait a second ping cycle. Check body/antenna orientation.
LED never changes: Verify Data Pin in firmware matches your wiring
Become a builder
Build your first network today
Order a starter kit, flash your first Duck, and see your network come alive. Join the OWL community to share your build and get support.