With this guide you can connect a NeoPixel LED strip (or even just a single LED) to your Duck and make it come alive with a rainbow pattern. You’ll be able to set exactly how many LEDs are on your strip and control them directly from the Duck. This setup does require a bit of hardware work — you’ll need to solder the strip’s power and ground to the Duck, and connect the data line to a chosen GPIO pin. Once wired, you’ll use the OWL DMS to flash the “LED Duck” firmware, enter your GPIO pin and the number of LEDs, and start lighting things up.
First, wire up your WS2812B (NeoPixel) LED strip to the Duck. Use the diagram below as a reference.
GND → GND (common ground between Duck and strip)
5 V → 5 V (power the LEDs)
Data → GPIO pin (we recommend GPIO 4)
💡 Tip: Always connect the strip’s DIN (Data In) side, not DOUT. If your strip has arrows, make sure data flows in the right direction.
You’ll enter this chosen GPIO pin later in the firmware builder.
Step 2 Open the Flasher
Note: For the next step you need access to your OWL DMS account, if you did not recieve your welcome email or have issues getting access, email support@owlintegrations.com
Before flashing your Smart LED MamaDuck, make sure you’ve created a new Mama under the Devices page in your DMS.
If not:
Go to Devices → Add Device.
Select the PapaDuck you want it connected under.
If you don’t have a PapaDuck yet, create one first.
Create a new MamaDuck.
Once that’s set up:
Log in to your OWL DMS account using a Chromium-based browser — we recommend Chrome, Edge, or Brave.
In the left-hand menu, navigate to Flash Device.
Plug your Duck into your computer via USB.
When prompted, allow WebUSB permissions so your browser can detect the device.
You’re now ready to select the correct MamaDuck firmware and flash it to your board.
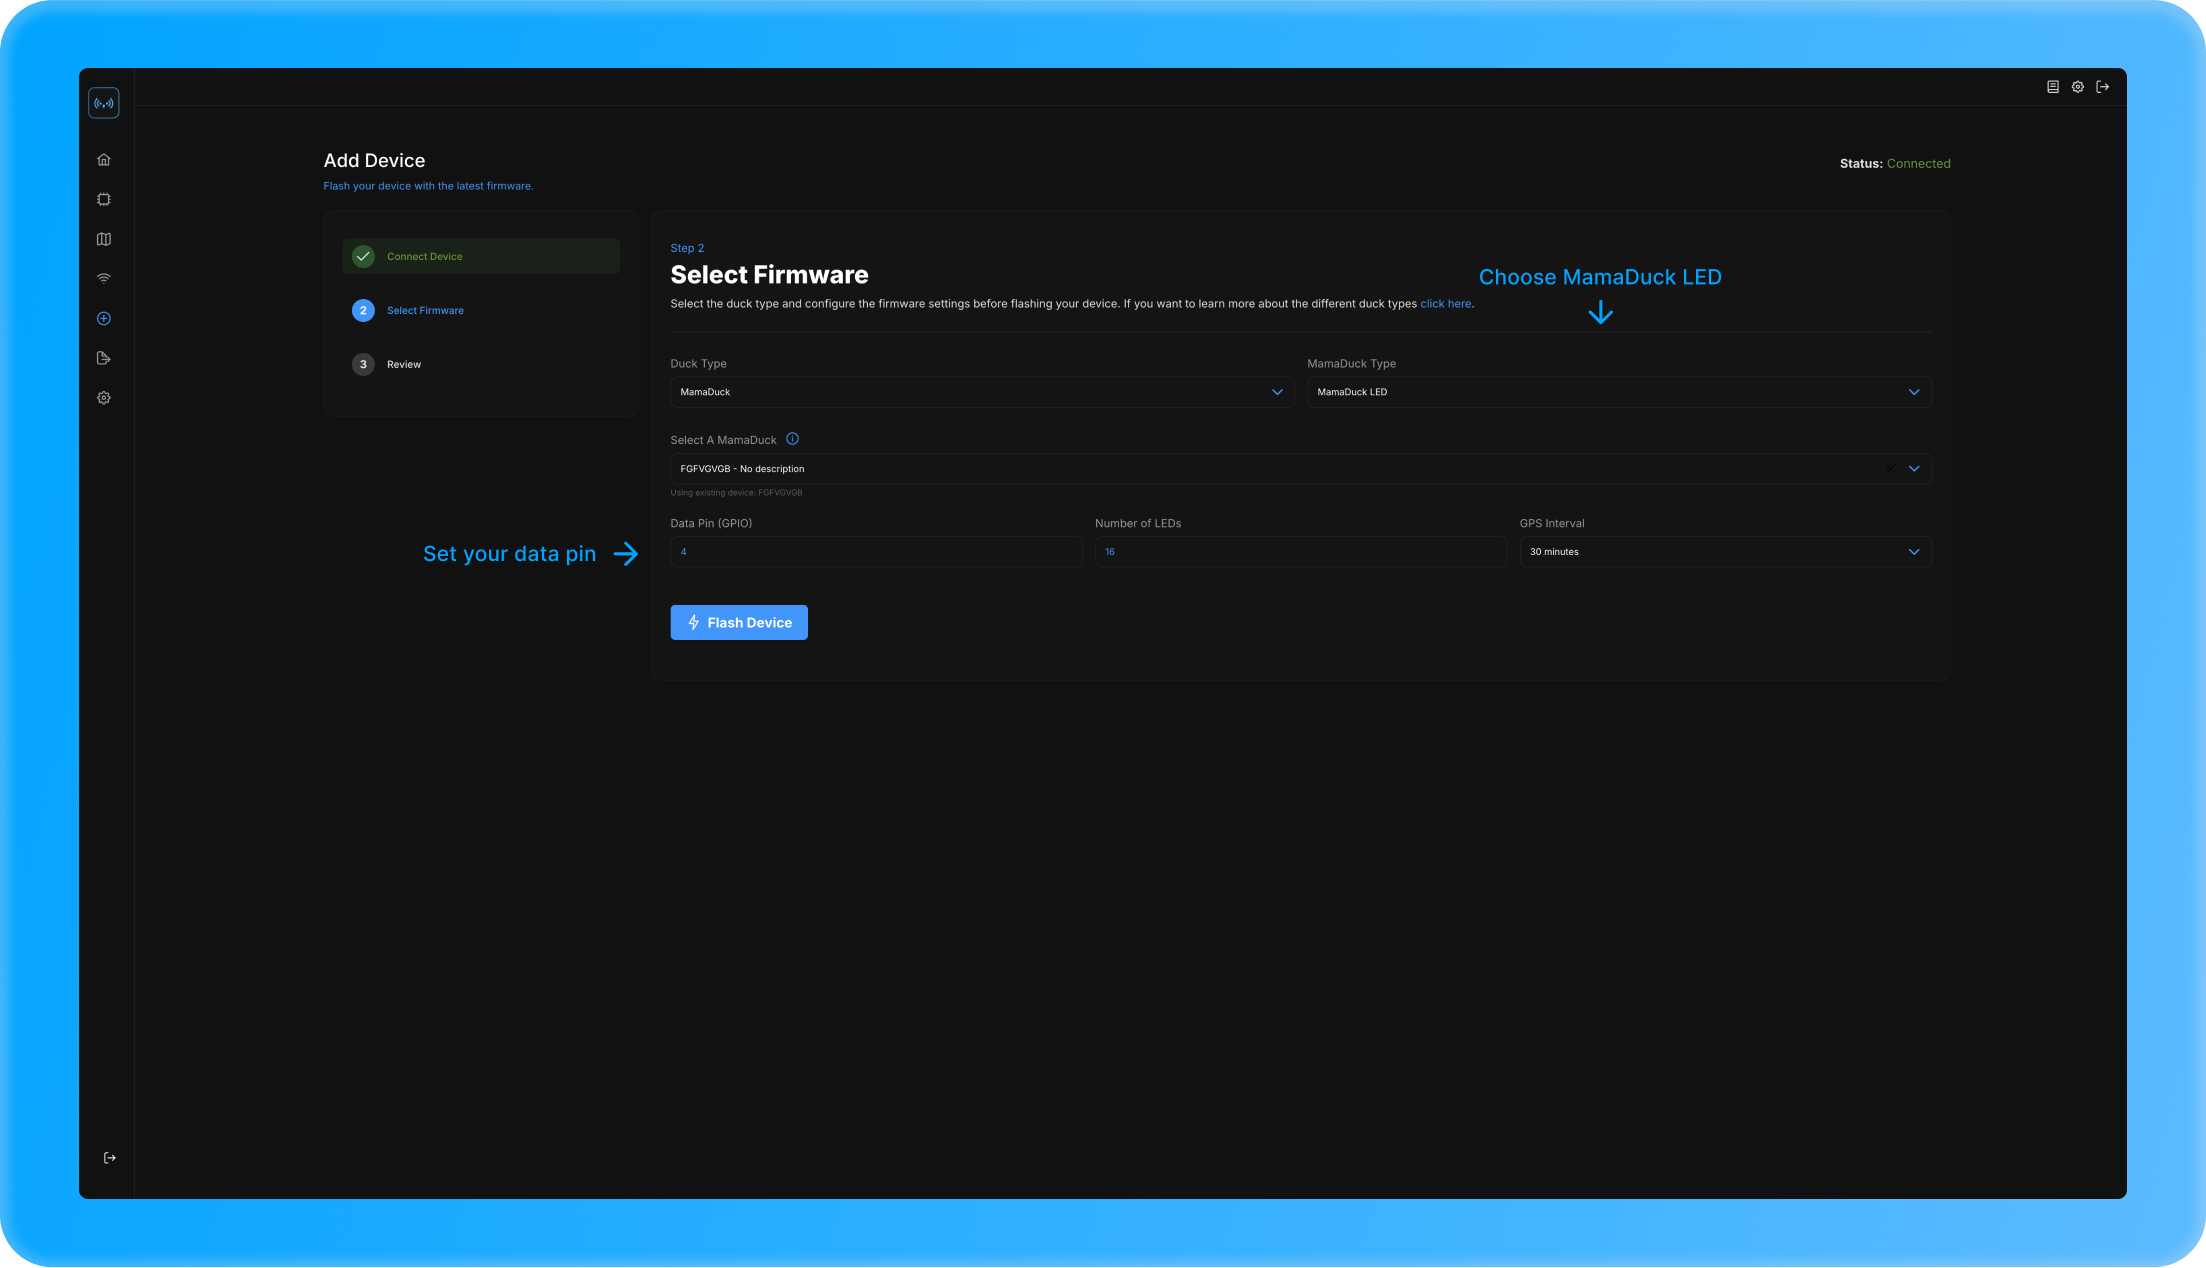
Step 3 Select LED Duck Firmware
From the list of firmware templates, choose LED Duck. This firmware enables control of WS2812B LED strips and comes with a built-in rainbow test pattern.
Step 4 Enter Configuration
You’ll now tell the firmware how your LED strip is connected:
Data Pin: Enter the GPIO pin number where you soldered the strip’s data line (e.g., 4).
Number of LEDs: Enter the total number of LEDs on your strip.
💡 Tip: If you’re unsure how many LEDs you have, count them carefully. Entering too high of a number won’t break anything, but unused LEDs may not light.
Step 5 Flash the Device
Click Flash Firmware. The process will compile and upload the configuration to your Duck.
When flashing is complete, your Duck will automatically reboot.
If everything is wired correctly, your LED strip should immediately begin displaying the rainbow animation.
Become a builder
Build your first network today
Order a starter kit, flash your first Duck, and see your network come alive. Join the OWL community to share your build and get support.